

There are many different free iPhone data recovery software available online. But the question is, whether they successfully recover data or not? With so many iPhone data recovery software with proofs, it is difficult for us who are really in need of a data recovery software.
It is risky to download the software without knowing whether it will work or not. It could be a possible malware or virus which can cause harm to your computer.
Which features should you look for in a free iPhone Data Recovery Software?
- Safety of your device takes priority. You do not want to cause more damage to your iPhone
- Easy to use user-friendly interface. The software should require no technical skills.
- It should work on all iOS versions, at least, the version you are using. You do not want to download a recovery software which does not work for your device.
- Check whether the software can recover the types of files you want to.
- The success rate should be high. The higher, the better the chances of you successfully recovering your data.
But, how are you going to find software which has all of these features? There is an iPhone Data Recovery Software who has all of these features. We present to you, Wondershare Dr.Fone – Data Recovery, a free iPhone data recovery software.
Wondershare Dr.Fone – Data Recovery
Wondershare has produced many famous products which are very helpful to people such as Filmora and PDFelement, Dr.Fone – Data Recovery is another useful product by them.
Dr.Fone – Data Recovery is a free iPhone Data Recovery software which helps users to recover any of their data stored in iOS which has been lost due to some reason. Wondershare Dr.Fone – Data Recovery software is the world’s first iPhone and iPad data recovery software. You can also recover iPhone data lost after restoring to factory settings.
Features of Dr.Fone – Data Recovery
- Supports both Windows OS and Mac OS. It is not necessary to have mac OS to recover data from an iPhone or iPad. If you have a Windows OS computer, you can even use that to recover files from your iPhone. It works on both operating systems.
- Support available for Windows OS version: Windows 10, 8, 7, Vista, XP (32-bit & 64-bit).
- Support available for Mac OS X 10.15,10.14,10.13, 10.12, 10.11, 10.10, 10.9, 10.8, 10.7, 10.6.
- Recover any data lost to deletion, water damage, resetting, device loss or any such unfortunate event,
- Retrieve lost contacts, emails, images, videos, notes, messages, call history from your iPhone easily.
- Also, recover data from your iCloud, iTunes, iPhone backup files directly through the software.
- Easy to use and user-friendly UI. You can use it even if you do not have any technical knowledge.
- Choose what you want to recover and what you do not want to.
- It supports iPhone X/8 (Plus)/7 (Plus)/6s/5s/5c/5 and the latest iOS 13.
Download Wondershare Dr.Fone – Data Recovery
You can download Wondershare Dr.Fone – Data Recovery from here.
Windows OS Users: Click here
Mac OS Users: Click here
How to install Wondershare Dr.Fone – Data Recovery?
Installation steps are easy to do and should not be an issue.
How to install Dr.Fone – Data Recovery on Windows?
- Download the .exe file.
- Open the File Explorer on your PC and in the download folder you will find the “drfone_recover_setup_full3366.exe”.
- Click on the installer and click install on the pop-up window and then the installation process will start.
- After this follow the on-screen instructions which will be shown.
How to install Dr.Fone – Data Recovery on Mac OS?
- Download Dr.Fone – Data Recovery from the above link.
- Click on the download file.
- A Pop window will pop up. Click agree on it to start the installation process.
- After this, drag the Dr.Fone icon to the Applications folder.
- Wait for a few seconds and Dr.Fone will be installed successfully.
How to use Wondershare Dr.Fone – Data Recovery?
If you haven’t followed the installation process, please do it soon. After installing, follow these steps to successfully recover your lost data from your iOS device
Step 1. Connect your iOS device to your PC
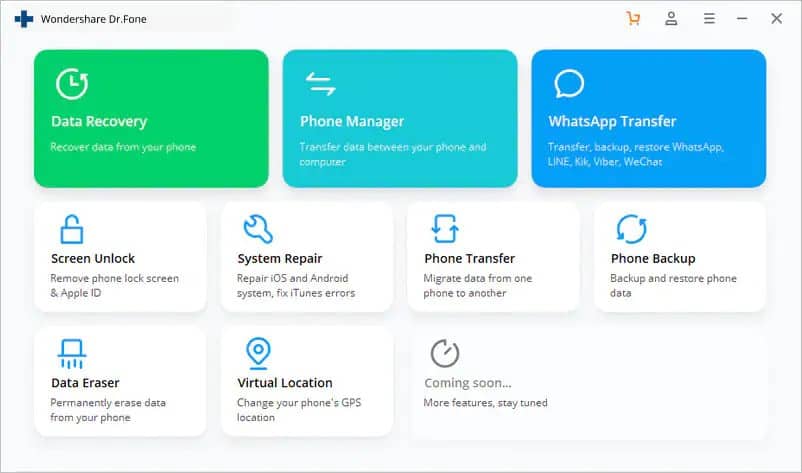
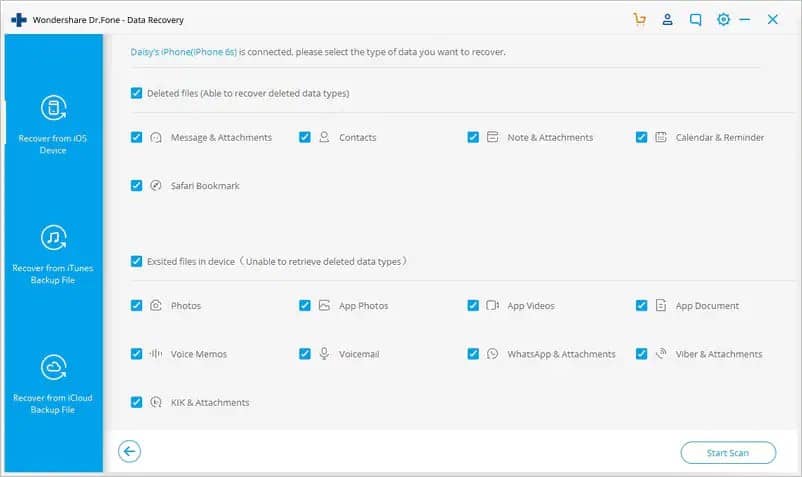
You need your iPhone’s, iPad’s or iPod’s original USB cable which came with it. Connect the USB cable to your computer. After connecting, launch Dr.Fone – Data Recovery and choose “Data Recovery”.
Once the software detects your device, it will start showing you various options. You can choose to recover deleted files (which are deleted from the device) and recover existed files in the device (which cannot be retrieved)
Important Note: Before running Dr.Fone, you should download the latest version of iTunes. Do not launch iTunes while running Dr.Fone as it will start automatically syncing. To avoid that you can also disable auto-sync in iTunes. Do this: launch iTunes > Preferences > Devices, check “Prevent iPods, iPhones, and iPads from syncing automatically”.
Step 2. Start scanning your device for lost data in it.
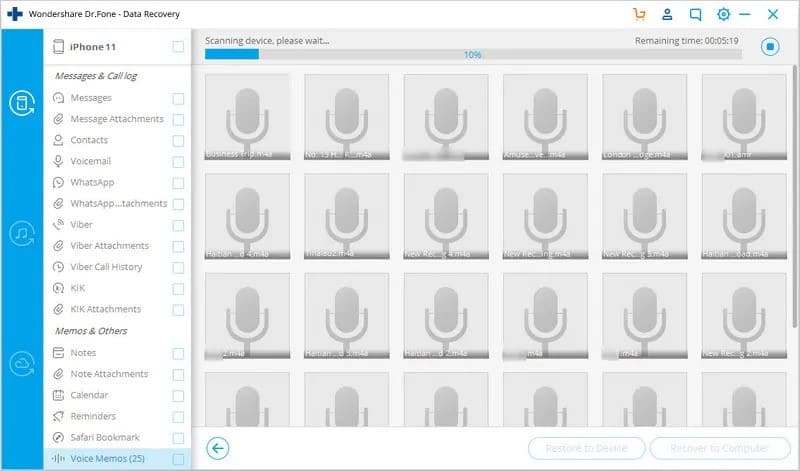
You can see a start scan button on the screen. Click on it to start scanning your device for the lost or deleted data you are trying to recover. Depending on how much data you have on your data, the scanning process will take time. If you are only looking for a specific file, then keep an eye on the scanning process. If you see that file, you can stop the scanning process by clicking the “Pause” button.
Step 3. Select what you want to recover from the scanned data.
Once the scan is completed, you can go through the list of both lost and existing data on the screen. If you only want to check the deleted items list, then swipe the option saying “Only display the deleted items” to ON.
You can also preview each file from the found data one by one by clicking on its file type. If you remember the file name of what you’re looking for, then search for it in the search box
Finally, after selecting the data you want to recover, click on the recovery button and save your data to your PC.