I will walk you through the various ways to take a Screenshot On a Chromebook to produce the images you desire, whether you want to grab the entire screen or a specific portion of the window.
If you have recently purchased a Chromebook, you have probably noticed that it is not like most laptops. Well, one of these differences is the lack of the Print Screen (PrtSc) key, commonly found on Windows laptops and used to capture screenshots.
Chromebooks are missing a dedicated screenshot button. The function is instead built into the Chrome OS. However, the process remains relatively straightforward and, in some ways, similar to taking screenshots on a Windows PC or Mac, except for a few keyboard shortcut differences and other steps.
[lwptoc]
How To Screenshot On Chromebook
Using the Show Windows key
By Using the Power & Volume down buttons
Using a stylus pen
By Using an external keyboard
Using advanced Chromebook apps
Using The Show Windows Key
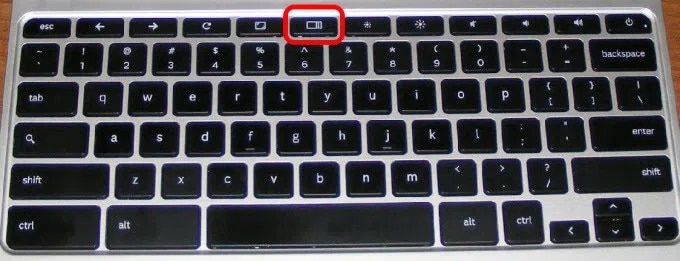
What button is Show Windows on Chromebook: Before using any of these methods to take screenshots on your Chromebook, you should become acquainted with a key on the keyboard known as the Show Windows key. It is known as the Overview key or the Windows Switcher key in some places, but Google refers to it as the Show all windows in Overview mode key.
Well, Show Windows will be used in this guide. This key is simply located just above the number row, between the entire screen and brightness down buttons on your keyboard. On the right side, it resembles a tiny rectangle with two vertical lines.
To capture an entire or partial screenshot, use various key combinations with the Show Windows key. Depending on the model & manufacturer of your Chromebook, the keys referenced below may appear differently on the keyboard.
- Press & hold the CTRL+Show Windows key to capture the entire screen. A notification window will show in the bottom right corner of the screen, indicating that the screenshot was successfully captured and saved.
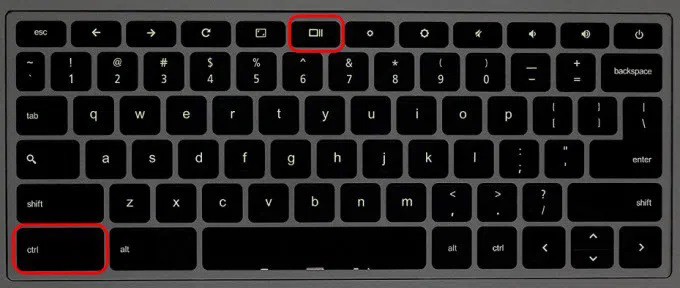
- To take a partial screenshot or select a specific region of your screen, press and hold the CTRL+SHIFT+Show Windows keys simultaneously.
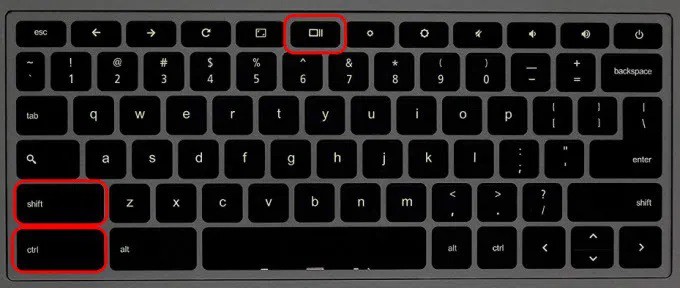
- Further, the mouse cursor will temporarily change to a crosshair icon, so tao and drag highlight the area you need to capture. After you have selected it, let go of the trackpad to take a screenshot.
A notification window will display in the lower right corner of your screen once more, showing that the process was successful and the screenshot was saved.
By Using The Power & Volume Down Buttons
If your Chromebook contains a 360-degree hinge, you can take screenshots in tablet mode by pressing the power & volume down buttons, just like you would on an Android smartphone or tablet.
The keyboard is normally inactive in tablet mode, so the Show Windows and CTRL key method will not work.
In tablet mode, press & hold down the power and volume down buttons simultaneously to capture an entire screen image.
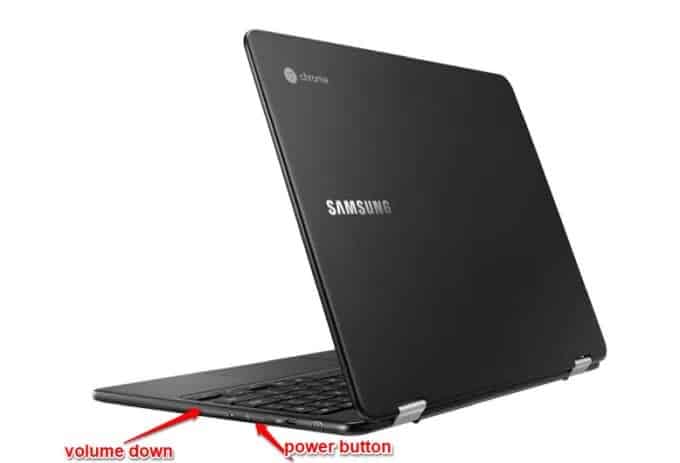
If you need a partial screenshot, crop the full screenshot you just took & save it. Unfortunately, in tablet mode, there’s no option for capturing specific areas of your screen.
Using a Stylus Pen
Some Chromebooks, like the Pixelbook or the Samsung Chromebook Plus, include a stylus with which you can capture a full or partial screenshot while in tablet mode and annotate it if desired.

Well, in the bottom right corner of the screen, a tool menu will appear. You can easily use the pen to draw or choose a region to capture a portion of the screen from here.
By Using An External Keyboard
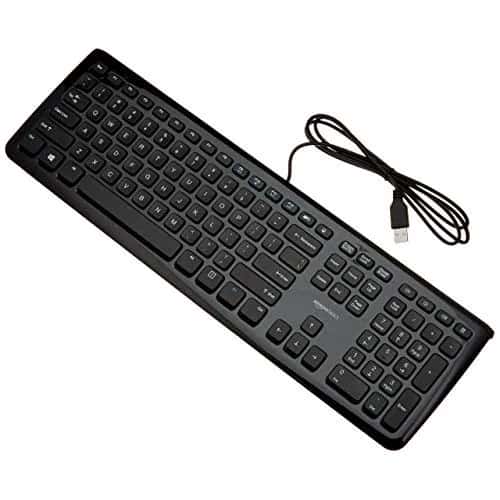
You can easily use an external keyboard with your Chromebook or a Chrome-powered desktop (Chromebox) to take screenshots.
External keyboards don’t always use Chrome’s dedicated button row, but their function keys perform the same function. For instance, the F5 button acts as the Show Windows key on standard function keyboards, so you’ll use CTRL+F5 to take a full screenshot and CTRL+SHIFT+F5 to take a partial screenshot.
Where Does The Screenshots Save To In a Chromebook?
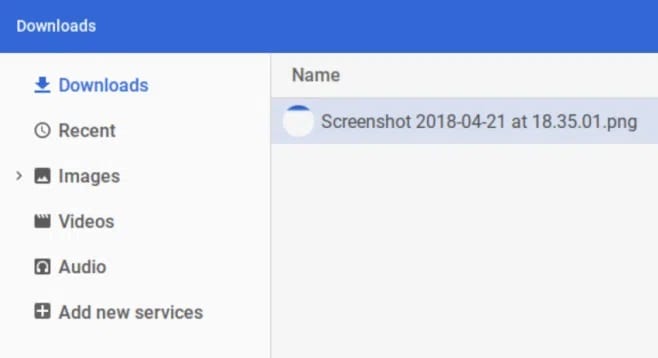
Screenshot image files are saved nearby on your Chromebook in the Downloads folder and are organized by the date and time they were taken. However, they will not be available on Google Drive, so you’ll have to move the files manually.
- To find a specific screenshot, simply open the Files app by clicking the folder icon on the Chrome OS shelf.
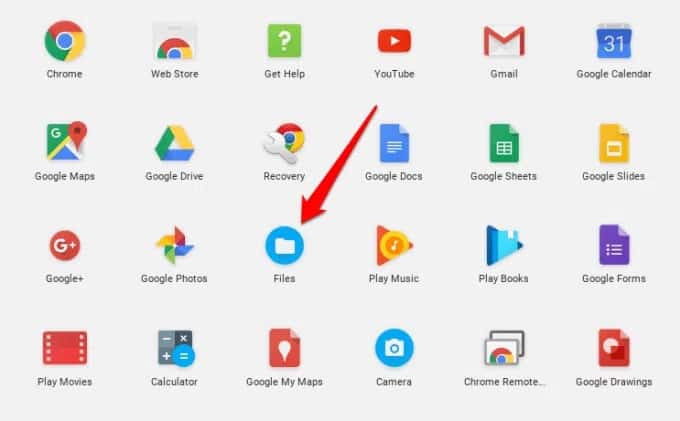
- Choose Downloads from the left menu pane and look for your screenshot on the right side of the Files interface.
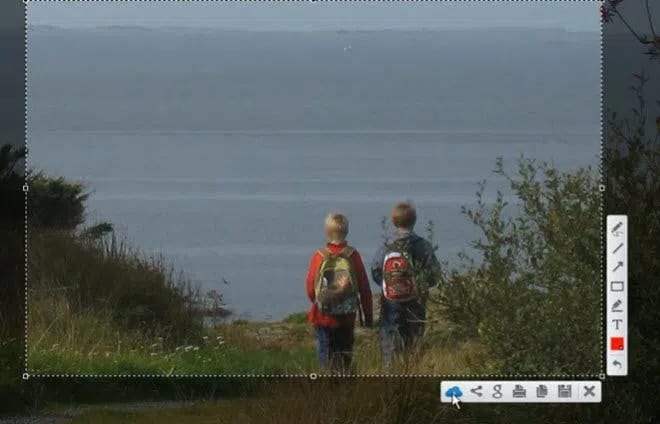
How To Edit Screenshots By Using The Native Image Viewer
You can simply use the built-in image viewer editor to do a lot with your screenshots before using or sharing them with others.
1. Navigate to Downloads and double-click the screenshot to launch the Image Viewer editor.
2. To enter Edit mode, click the pen icon in the window’s lower right corner. At the bottom of this window, you will find tools for cropping, rotating, & adjusting brightness.

Because Image Viewer doesn’t allow you to save copies of your edits, click the pen icon again to finalize your changes.
Use Advanced Chromebook Apps
Numerous Chromebook extensions and apps are available for taking screenshots on a Chromebook that provide more functionality than the built-in methods described above. Here are some of the top-rated Chromebook apps for enhancing your screenshot-taking capabilities.
FireShot
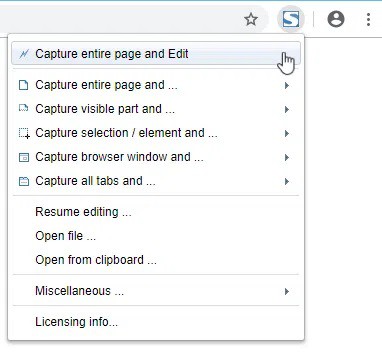
It is a free extension that allows you to take full or partial screenshots (including web pages), edit and save them in multiple formats, and send them directly to Gmail or OneNote.
SuperChrome
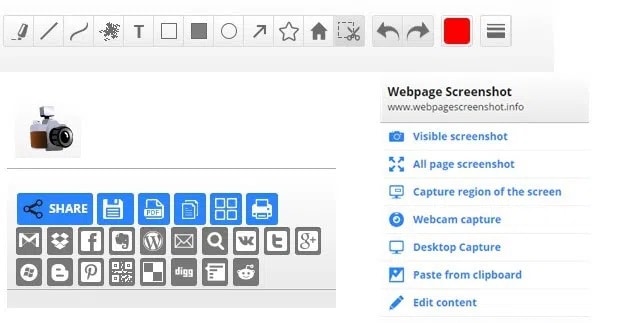
This extension makes it easier and faster to capture full-screen screenshots of web pages. It includes tools for entire screenshotting websites and editing, sharing, and conversion options in various formats, including PDF conversion.
Awesome Screenshot
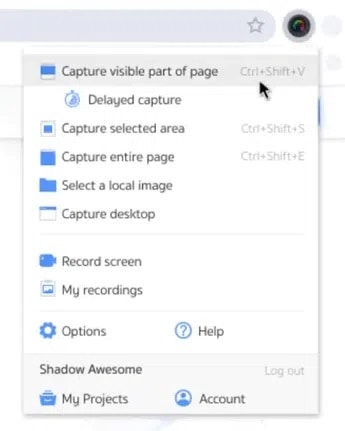
With this extension, you can take screenshots, screencasts (screen recordings), and videos whenever you want. Additionally, it supports annotations and blurring, other screenshot-related features also.
Lightshot
ALSO READ: Make Steam Downloads Faster
It is a simple tool for taking screenshots of any section of your website. Please drag & drop the image to any part of your screen, edit it in place, and then download or send it to the cloud.