Once the battery level on your laptop falls below 20%, it’s time to get the charger and plug it in. But what happens if nothing happens? In this post, we’ll look at what you can do in this situation if your Laptop Plugged In but Not Charging. This way, you will not have to panic and assume that your laptop has reached the end of its useful life.
[lwptoc]
How to Fix Laptop Plugged In, but Not Charging
Double-check the connection
Before you do anything, double-check that your laptop’s charger is plugged in. If you’re in a hurry, you might make this mistake.
Rather than reacting immediately, check to see if your laptop’s charger is plugged in. Then, check to see if the outlet you used to plug in your charger is still operational.
Remove Battery
If your laptop Plugged In Not Charging, the battery could be the problem. If so, find out about its credibility.
Take it out and press (and hold) the power button for about 15 seconds if it’s removable. It will deplete the remaining power in your laptop.
Then connect your laptop’s power cable and turn on the device. Must ensure the laptop battery is still out of the picture as you do this.
You can tell if something is wrong with your power adapter using this setup. If your laptop boots up correctly, it means your power adapter is also operational. As a result, the issue is with your battery.
You may have a faulty battery. What is the solution? Replace the battery!
This solution is also available for Mac users. However, your laptop (like most Macs) may not have a visible compartment for the battery on the bottom. In this case, you’ll need to figure out how to open your laptop safely and remove the battery.
Use Updated Drivers
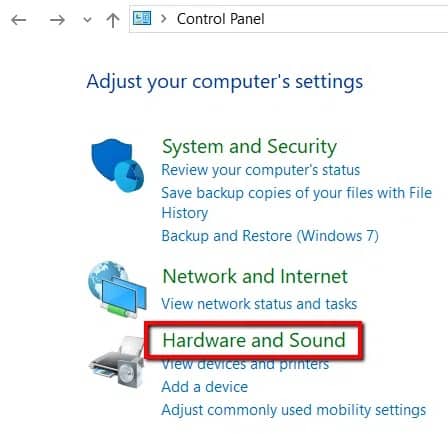
If the plugged in, charging but not charging issue isn’t with your battery, it could be with your drivers. To begin, press the Windows key and select Control Panel.

Choose Hardware and Sound.
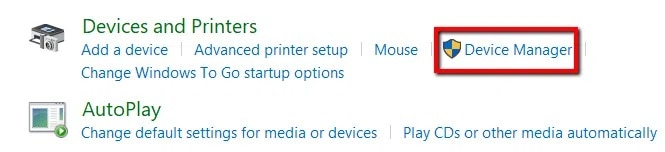
Select Device Manager from the Devices and Printers menu.
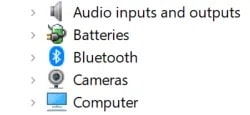
Choose Batteries.
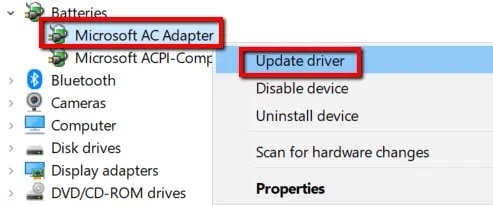
To begin, navigate to Microsoft AC Adapter. Then, right-click it and choose Update Driver.
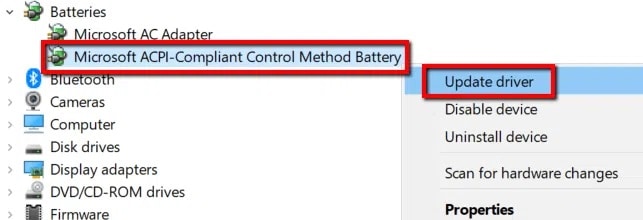
Proceed to the Microsoft ACPI-Compliant Control Method Battery. Right-click it and choose Update Driver.
Once you’ve completed the updates, restart your laptop and plug in your charger. It should be all right now.
Otherwise, go to the manufacturer’s website to download the drivers. Finally, make sure you go to the official website and download the most recent versions of the drivers.
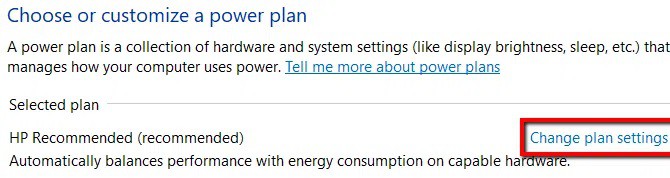
Check Power And Sleep Settings
The issue could also be with your settings. Here’s what you need to do to test laptop plugged in not charging Windows 10 device.
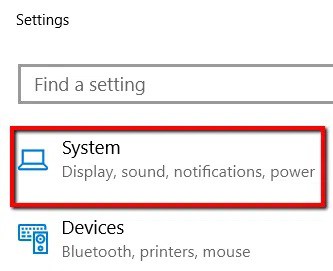
Launch Settings by pressing the Windows key.

Choose System.
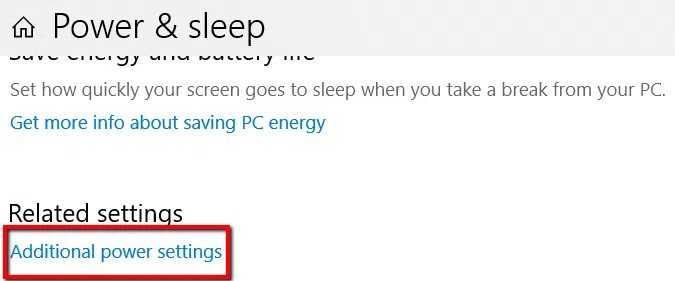
And then select the Power & sleep category.

Open Additional power settings from the Related settings menu.
Select Change plan settings from the drop-down menu.
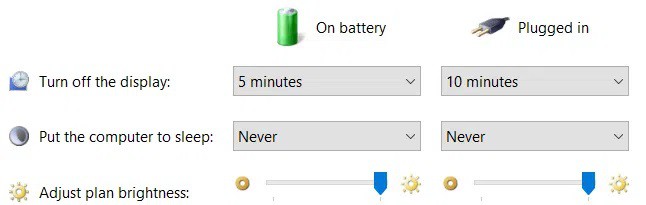
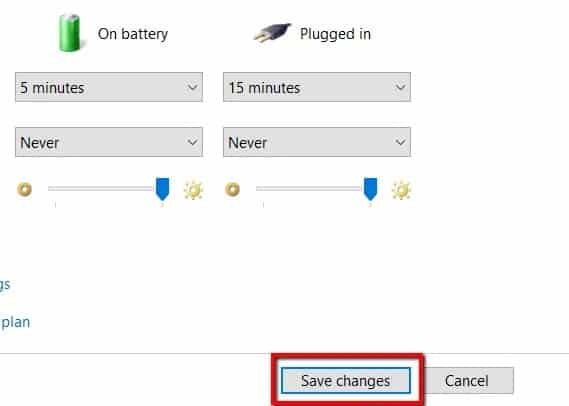
Then ensure that the appropriate settings are used.
To make any changes to the settings, click Save changes.
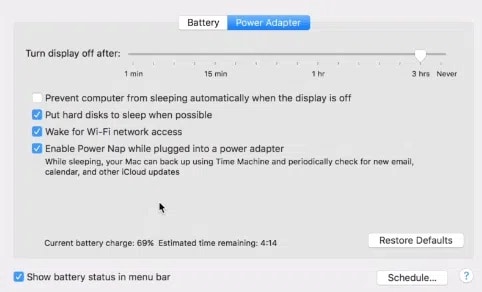
You can also access this if you have a Mac. To begin, navigate to System Preferences and select Energy Saver.
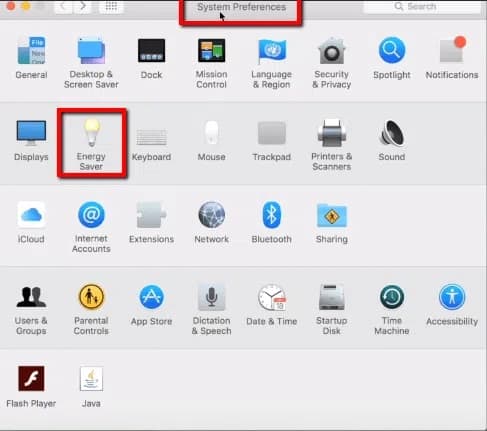
Apply the appropriate settings there.
Seek Outside Help
In case none of the above solutions ‘laptop battery not charging’ worked, it’s time to seek professional help. Inform them of your problem, and don’t forget to include the model number of your laptop.
It’s most likely a hardware issue at this point. Either the laptop power adapter is faulty, or the computer’s power port is no longer operational. If you have access to a spare adapter, it is best to rule out the power adapter first.
ALSO READ: Torrent Search Engine Sites
The issue may be specific to your laptop. And if that’s the case, an experienced tech support representative can assist you.